
Thank you! Your submission has been received!
Oops! Something went wrong while submitting the form.
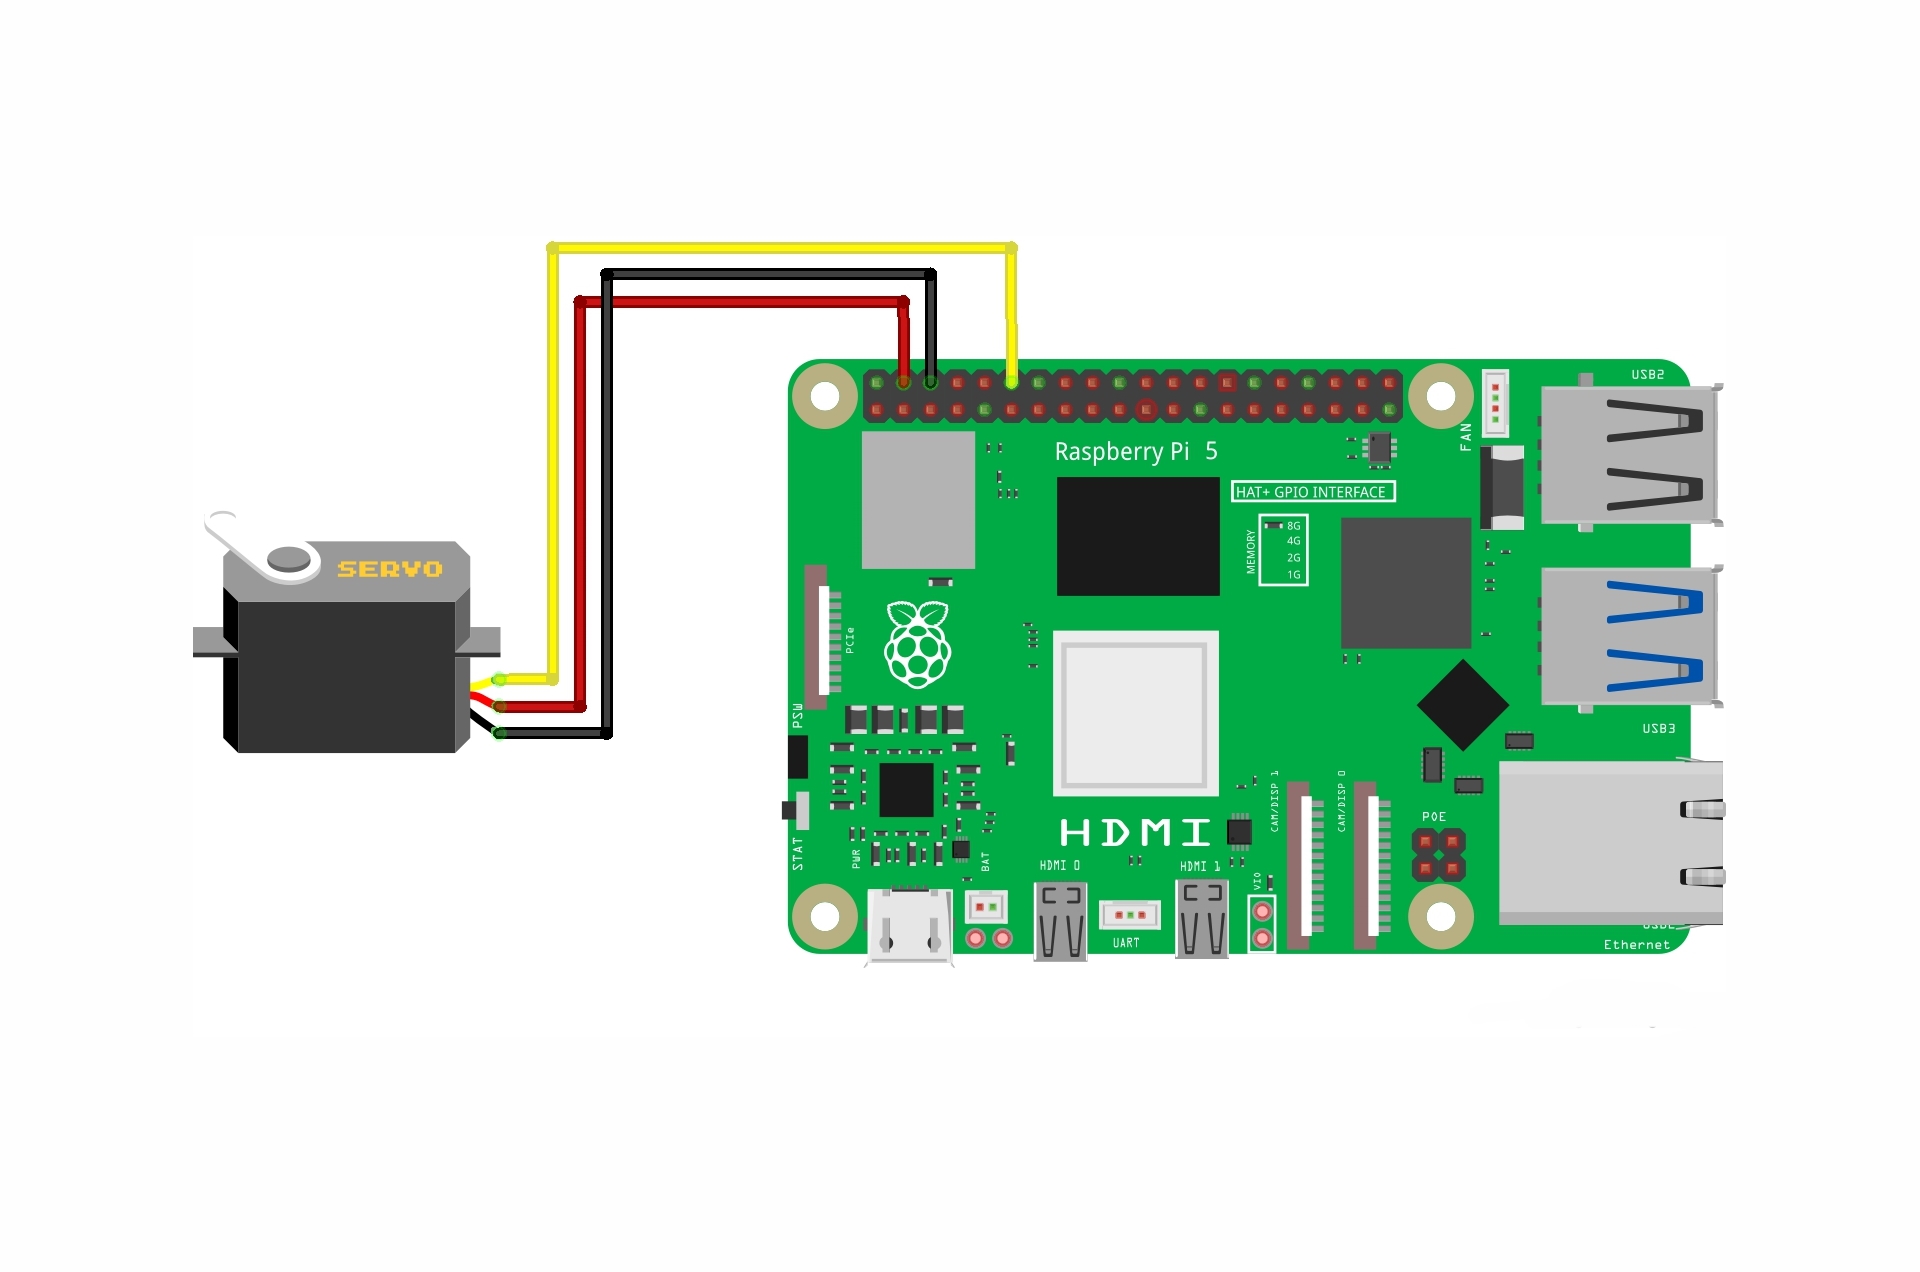
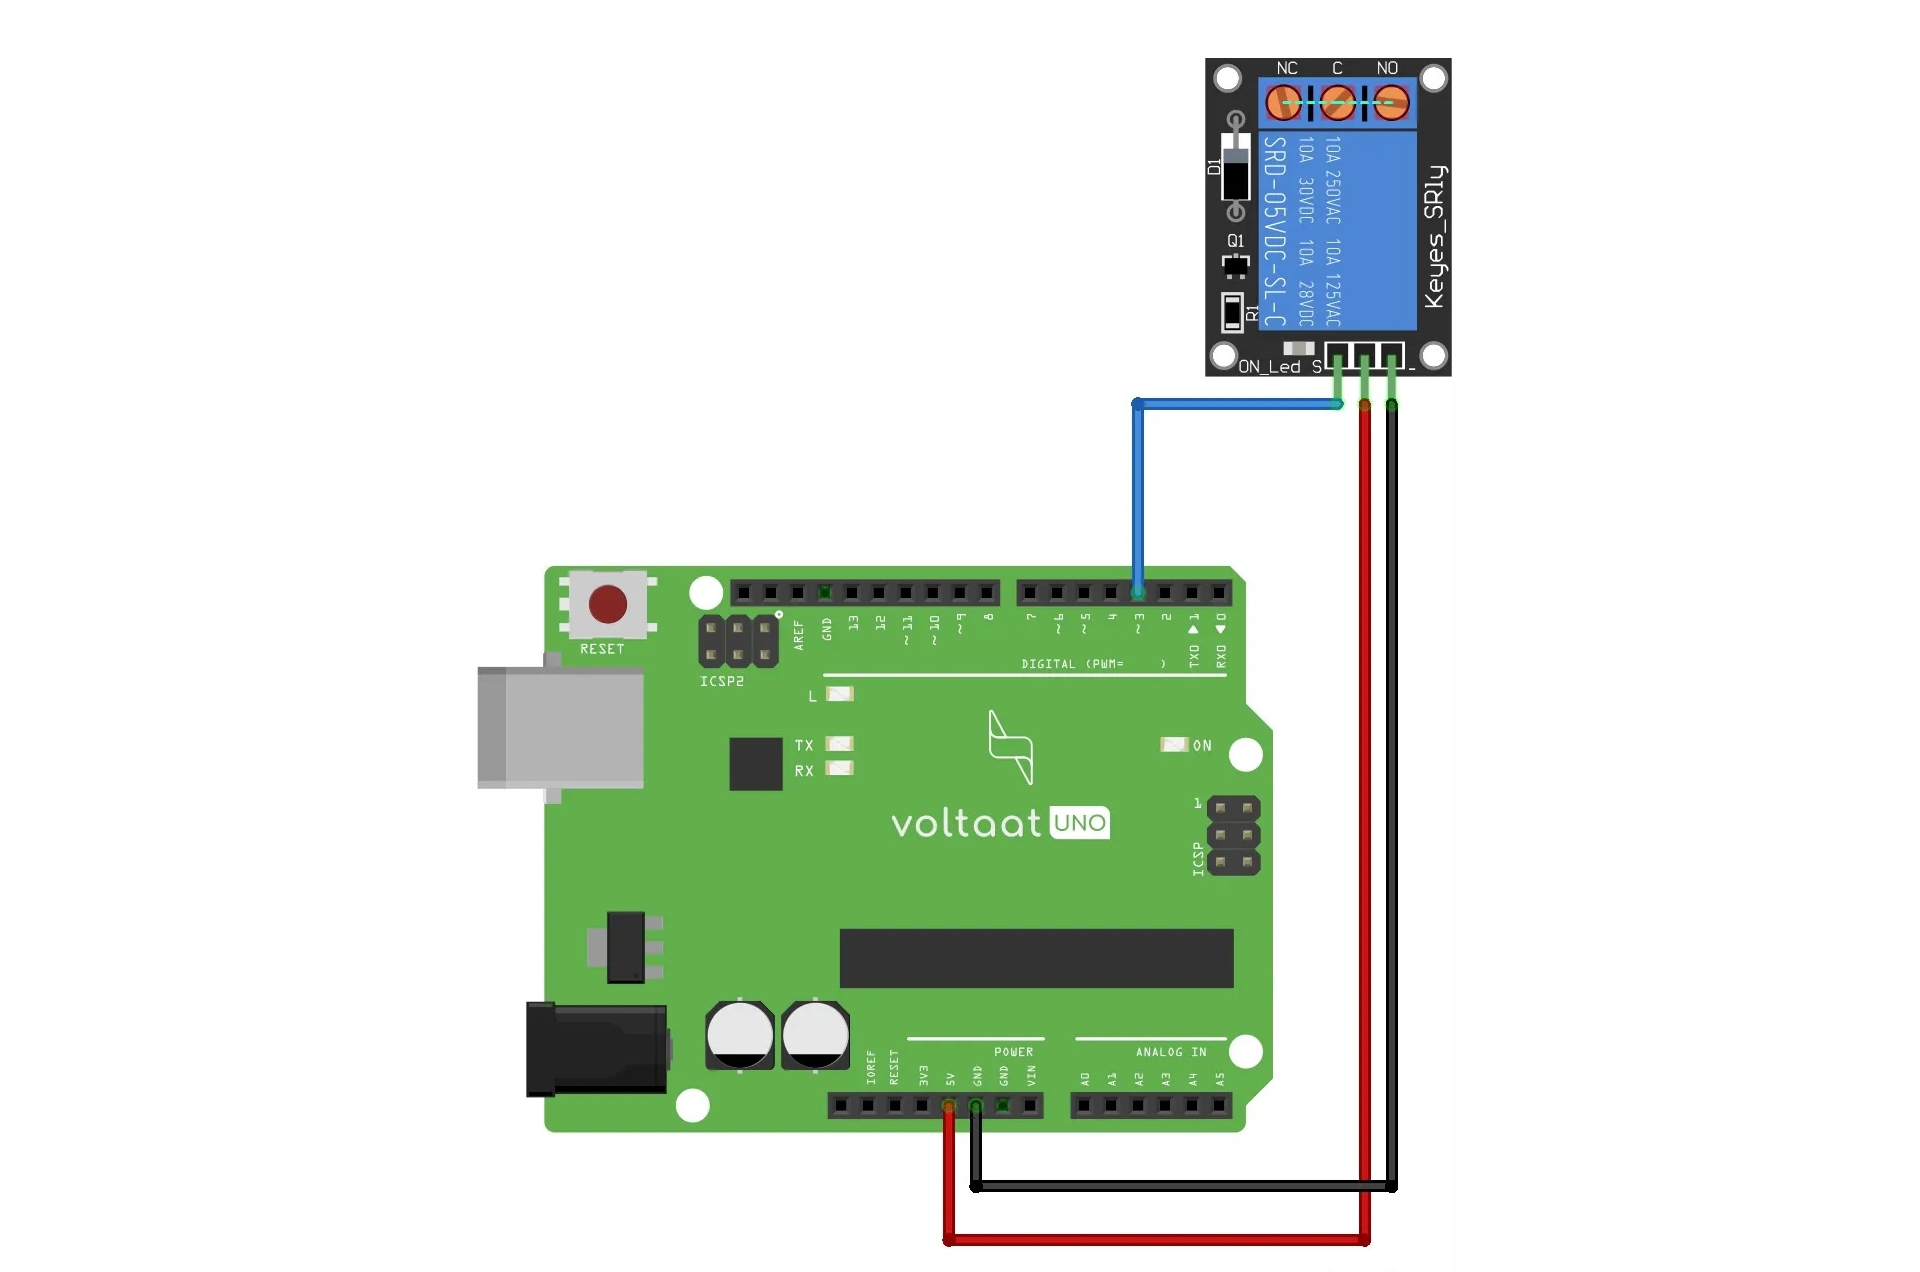
Voltaat Learn
Providing knowledge about Arduino, basic electronics and more in an easy, straightforward way to help beginners be experts!
Providing knowledge about Arduino, basic electronics and more in an easy, straightforward way to help beginners be experts!


.gif)


