Thank you! Your submission has been received!
Oops! Something went wrong while submitting the form.
Arduino
140 min
Share

Control servo motor with Joystick and Arduino

You may often need to control the movement of an object at a specific angle and speed. In this tutorial, we will use a joystick to control the servo motor shaft to sweep back and forth across 180 degrees with Arduino.

Project Video

Overview

In this tutorial, we will use a joystick to control the servo motor shaft to sweep back and forth across 180 degrees with Arduino and display the angle of servo motor on a TFT Display.

Getting the Items

Arduino Uno R3 (Voltaat Version)
Get Item
2.8 inch Touch Screen Module
Get Item
SG90 Servo -Positional Rotation
Get Item
JoyStick Module
Get Item
1/4 Watt Resistor (20 Pack)
Get Item
Half-size Breadboard
Get Item
Jumper Wires - Male to Male (40 Pack)
Get Item

Steps

Wiring it Up

It is important to connect resistors with a value of 10 kilo ohms to the pins of the TFT Display, as shown in the image.

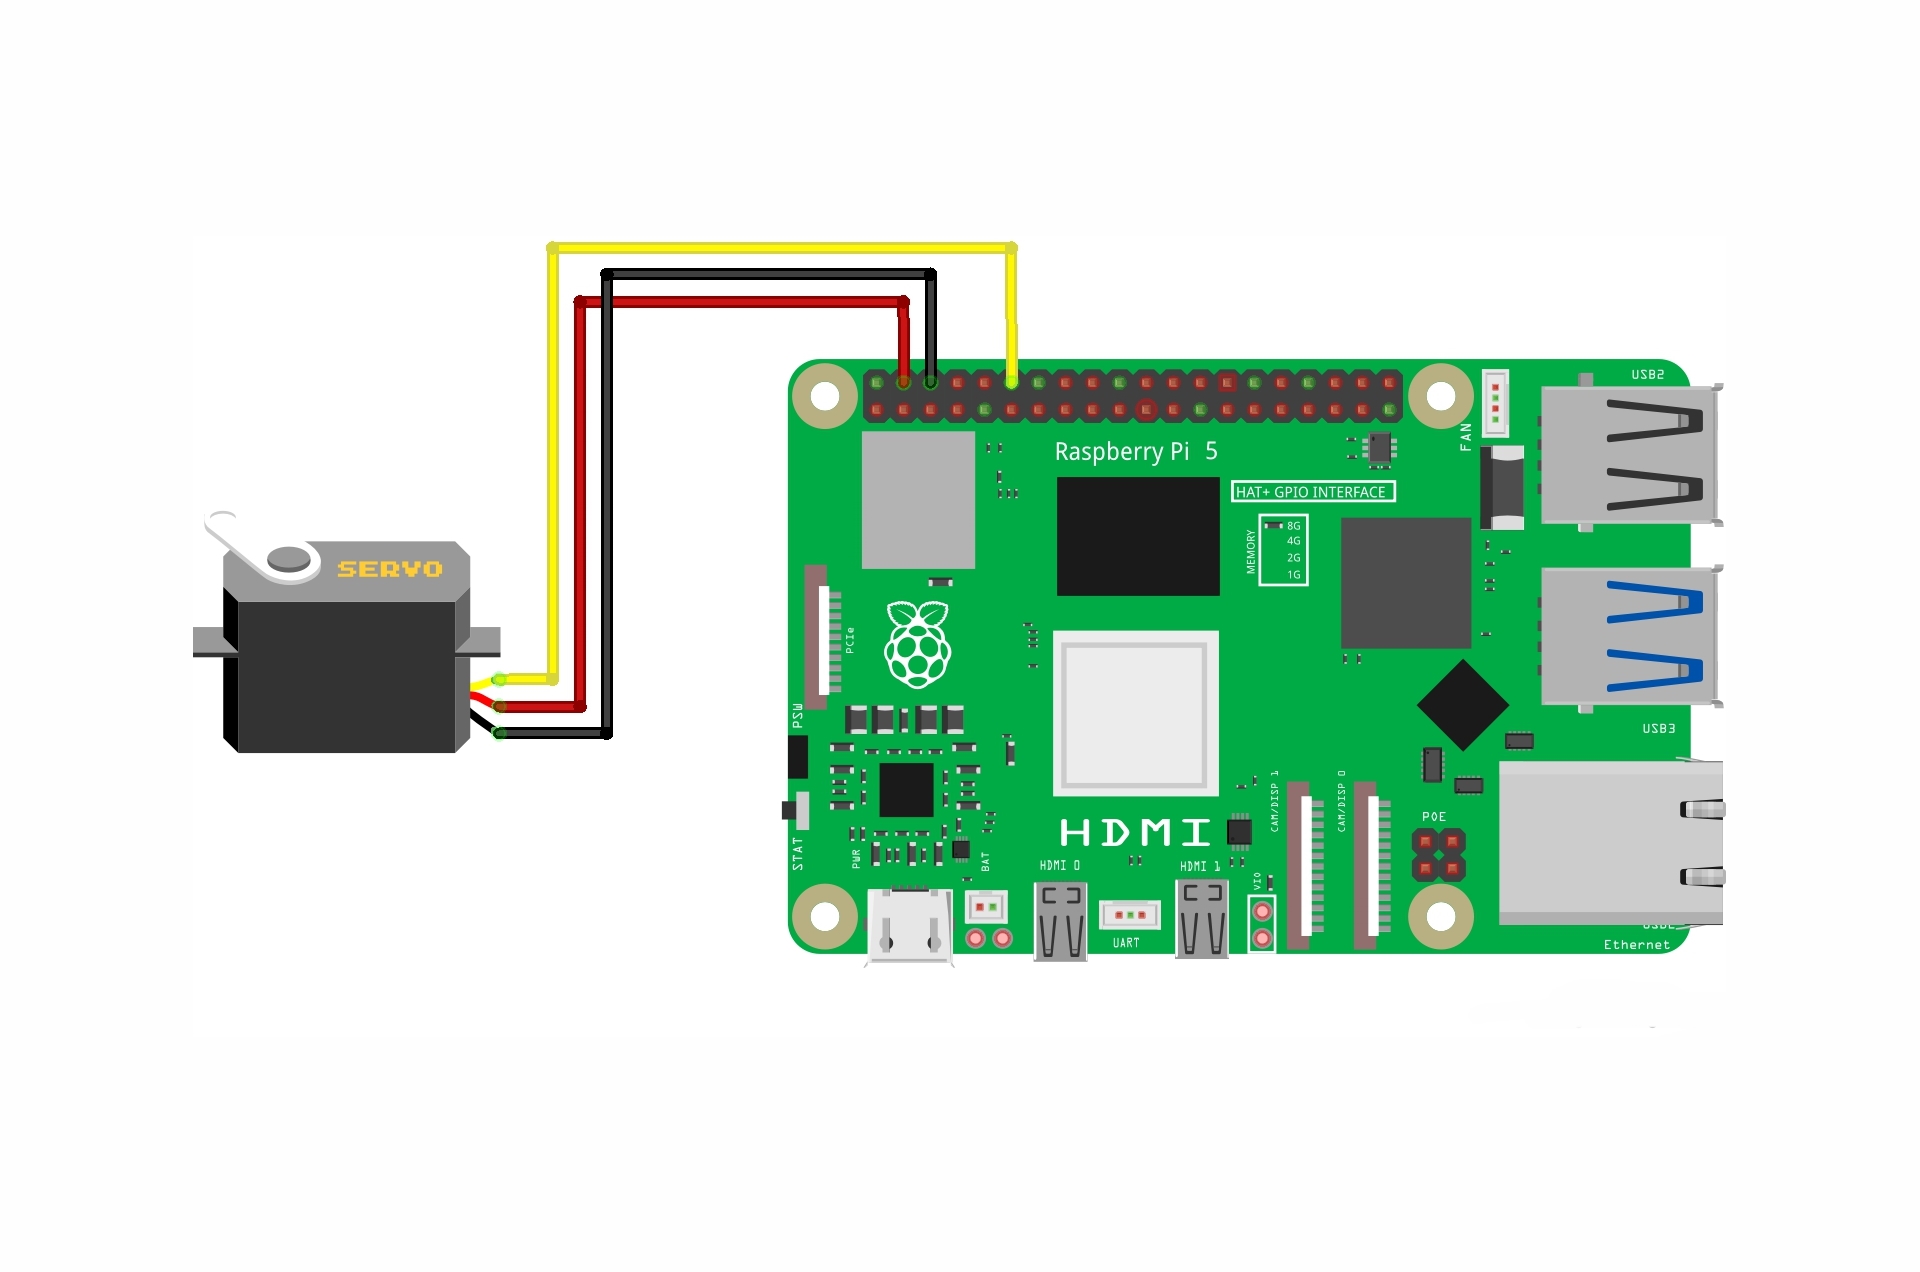
Connect the wires between the TFT Display and the Arduino and the Servo motor and the joystick as shown in the image below.


Connections from the Arduino to the breadboard:

  • Arduino GND pin → Breadboard ground line

  • Arduino 5V pin → Breadboard 5V line


Connections from the servo motor:

  • Servo GND pin→ Arduino GND pin

  • Servo VCC pin→ Arduino VCC pin

  • Servo signal pin → Arduino pin 4


Connections from the joystick:

  • joystick GND pin→ Arduino GND pin

  • joystick VCC pin→ Arduino VCC pin

  • joystick x_axis pin → Arduino pin A0


Connections from the TFT Display to the breadboard:

  • TFT Display VCC pin → Breadboard 5V line

  • TFT Display GND pin → Breadboard ground line

  • TFT Display LED pin → Breadboard 5V line


Connections from the l298n motor driver to arduino :

  • TFT Display CS pin → Arduino pin 10

  • TFT Display RST pin → Arduino pin 8

  • TFT Display DC pin → Arduino pin 9

  • TFT Display MOSI pin → Arduino pin 11

  • TFT Display SCK pin → Arduino pin 13

  • TFT Display MISO pin → Arduino pin 12

Coding


/*
Voltaat learn (http://learn.voltaat.com)
Link for full tutorial:

Tutorial: Control servo motor with Joystick and Arduino!
Wire Library:
Adafruit_GFX Library:
Wire Library:


The purpose of this sketch is to use a joystick to control the servo motor shaft to sweep back
and forth across 180 degrees with Arduino and display the angle of servo motor on a TFT Display.


Connections from the Arduino to the breadboard:

• Arduino GND pin → Breadboard ground line

• Arduino 5V pin → Breadboard 5V line

Connections from the servo motor:

• Servo GND pin→ Arduino GND pin

• Servo VCC pin→ Arduino VCC pin

• Servo signal pin → Arduino pin 4

Connections from the joystick:

• joystick GND pin→ Arduino GND pin

• joystick VCC pin→ Arduino VCC pin

• joystick x_axis pin → Arduino pin A0


Connections from the TFT Display to the breadboard:

• TFT Display VCC pin → Breadboard 5V line

• TFT Display GND pin → Breadboard ground line

• TFT Display LED pin → Breadboard 5V line


Connections from the l298n motor driver to arduino :

• TFT Display CS pin → Arduino pin 10

• TFT Display RST pin → Arduino pin 8

• TFT Display DC pin → Arduino pin 9

• TFT Display MOSI pin → Arduino pin 11

• TFT Display SCK pin → Arduino pin 13

• TFT Display MISO pin → Arduino pin 12

*/

#include "Adafruit_GFX.h"    
#include "Adafruit_ILI9341.h"
#include "Wire.h"
#include "SPI.h"
#include "Servo.h"

Servo servo;
int x_axis;
float servo_val;

//Define pin numbers
#define TFT_DC 9              
#define TFT_CS 10            
#define TFT_RST 8            
#define TFT_MISO 12          
#define TFT_MOSI 11          
#define TFT_CLK 13          

Adafruit_ILI9341 tft = Adafruit_ILI9341(TFT_CS, TFT_DC, TFT_MOSI, TFT_CLK, TFT_RST, TFT_MISO);

char ANGLEChar[10];
 
void setup(){
 
Serial.begin(9600);
tft.begin();                      
tft.setRotation(0);            
tft.fillScreen(ILI9341_GREEN);

pinMode(A0,INPUT);
servo.attach(3);

Wire.begin();
printText("SERVO ANGLE:", ILI9341_WHITE,20,130,3);

}

void loop()
{

x_axis=analogRead(A0);

servo_val=map(x_axis,0,1023,180,0);

servo.write(servo_val);

//Convert float to string
String servo_valString = String(servo_val,1);
servo_valString.toCharArray(ANGLEChar,10);
//Draw a Rectangle
tft.fillRect(50,175,150,40,ILI9341_BLACK);
//printing the servo angle value on the TFT Display
printText(ANGLEChar, ILI9341_WHITE,50,180,4);

}
//The function of writing words on the TFT Display
void printText(char *text, uint16_t color, int x, int y,int textSize)
{
 tft.setCursor(x, y);
 tft.setTextColor(color);
 tft.setTextSize(textSize);
 tft.setTextWrap(true);
 tft.print(text);
}

Testing it Out

Once you’ve uploaded the code to the Arduino board, you will be able to use the joystick to control the servo motor shaft and the TFT Display will display the angle of the servo motor as shown in the video below:

Resources

No items found.