Thank you! Your submission has been received!
Oops! Something went wrong while submitting the form.
Voltaat Arduino Ultimate Kit
40 min
Share

Control a relay using the Arduino

Most of us are familiar with the switches used in household devices. A relay is a type of switch that can be connected to an Arduino or any other microcontroller.

Project Video

Overview

In this tutorial, we will use the Arduino to control a relay on and off every three seconds. You can use the same code to control a fan to be turned on and off automatically every 10 minutes to save power!

Getting the Items

Arduino Uno R3 (Voltaat Version)
Get Item
1 Channel Relay Module
Get Item
DHT11 Temperature & Humidity Sensor
Get Item
Jumper Wires – Male to Female (40 Pack)
Get Item

Steps

Wiring it Up

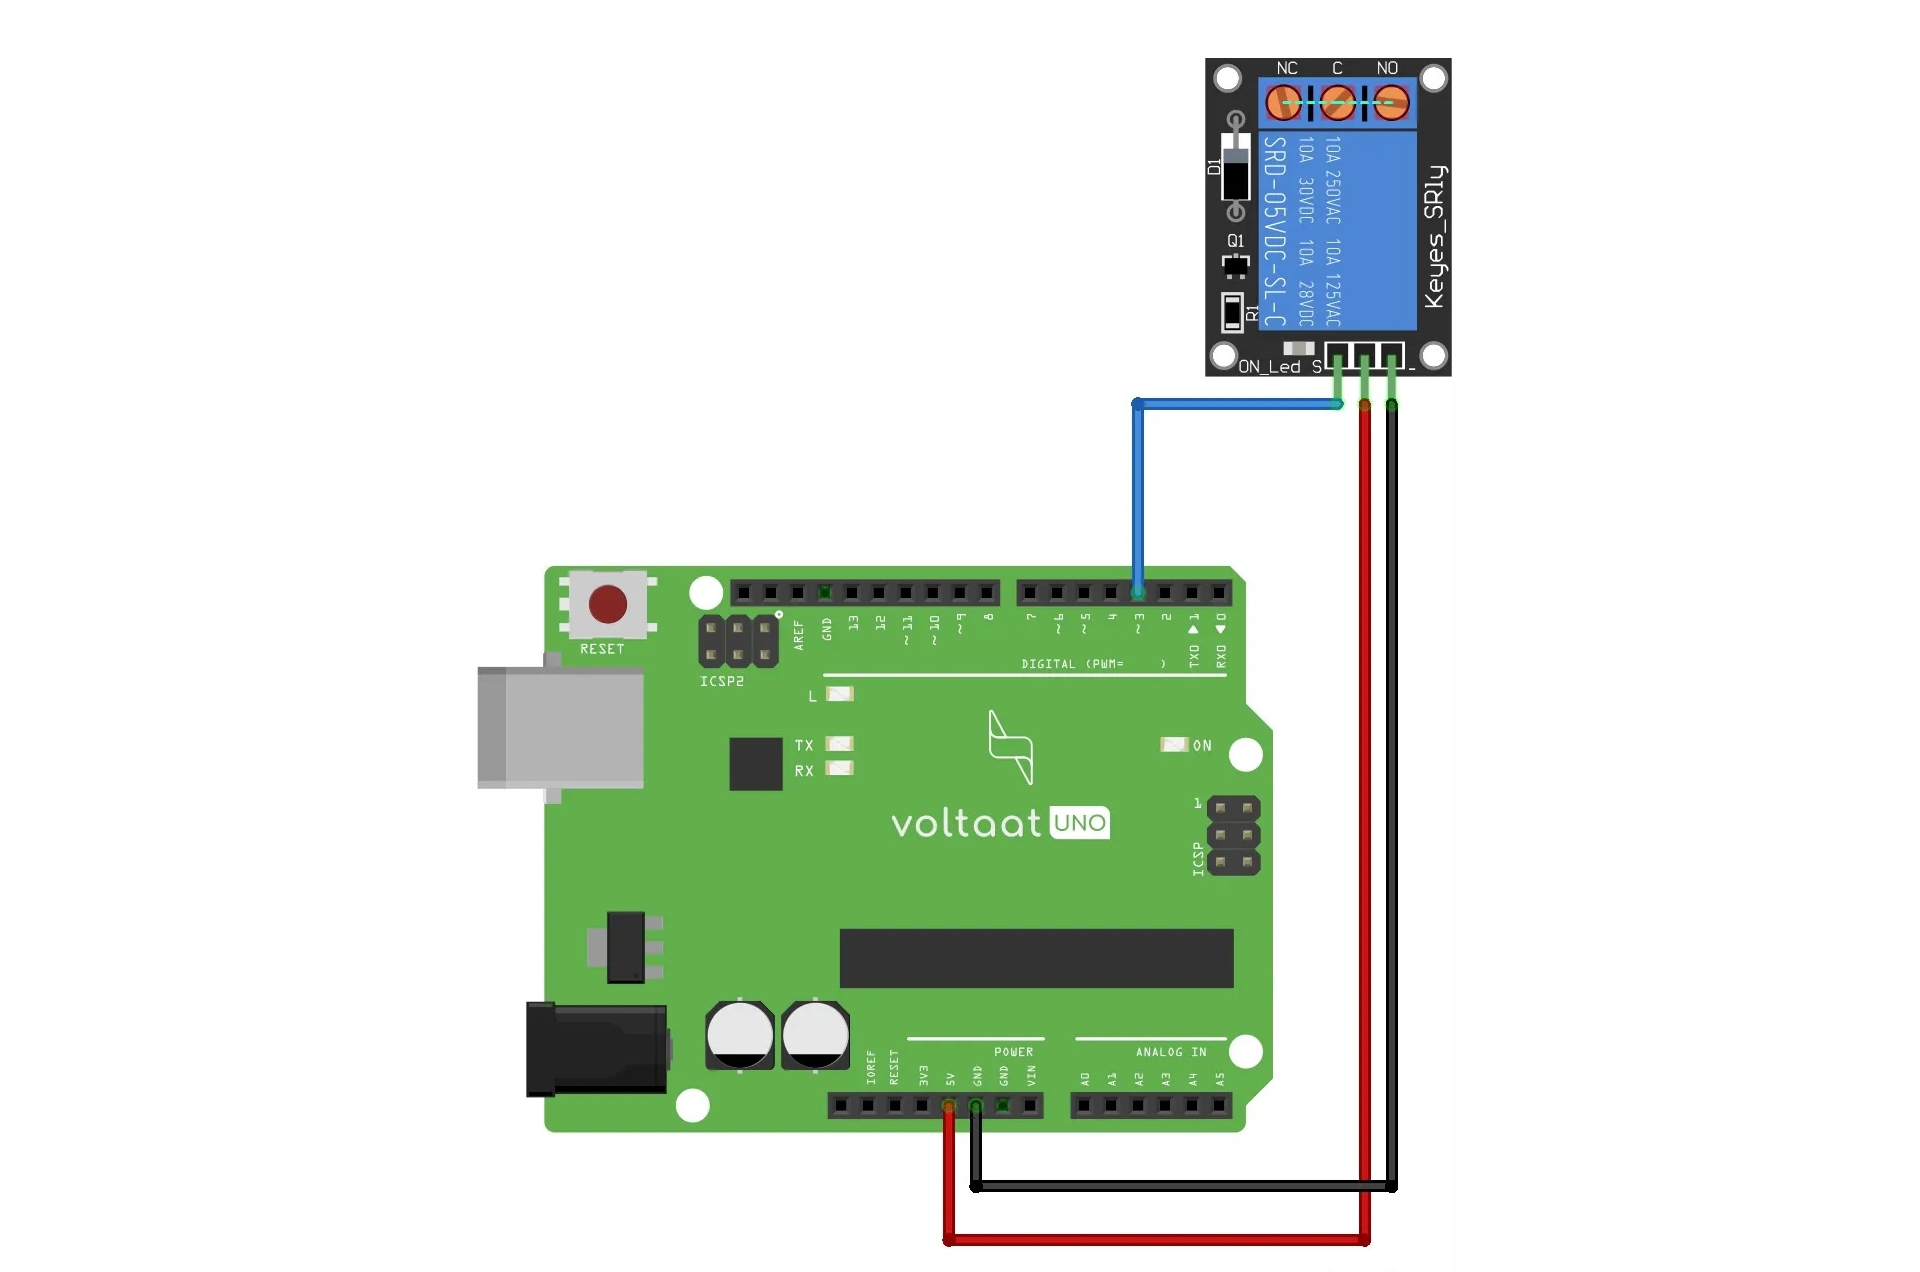
Connect the wires between the relay and the Arduino, as shown in the image below.

 Connections from the Arduino to the DHT11:


       • Arduino GND pin → DHT11 GND pin (- pin)


       • Arduino 5V pin → DHT11 VCC pin (+ pin)


       • Arduino pin 3 → DHT11 out pin

Coding


/*
 Voltaat learn (http://learn.voltaat.com/)
 Link for full tutorial:
 Link for libraries:

 Tutorial: Monitor temperature and humidity using DHT11

 This is an Arduino sketch that monitor temperature in Celsius degrees and humidity
 in percentage by using the DHT11 sensor with Arduino

 Connections from the Arduino to the DHT11:
 • Arduino GND pin → DHT11 GND pin (- pin)
 • Arduino 5V pin → DHT11 VCC pin (+ pin)
 • Arduino pin 3 → DHT11 out pin

*/

//include the DHT sensor Library
#include "DHT.h"

//Define Parameters to DHT function, 3 Refers to digital pin 3 in arduino which you can change with any other digital pin, DHT11 is the sensor type.
DHT dht (3, DHT11);

//define two variables for Temperature and Humidity.
float Temperature, Humidity;

// Commands inside void setup run once.
void setup()
{
 //Initialize the DHT sensor with the begin() method.
 dht.begin();

 //Start the serial monitor at 9600 baud rate (9600 bits per second)
 Serial.begin(9600);
}

//Commands inside void loop run forever
void loop()
{
 //wait for 1 sec to get a stable reading from the sensor
 delay(1000);

 //Read the Temperature value from the sensor
 //You can use Temperature = dht.readTemperature(True); to print the temperature value in Fahrenheit.
 Temperature = dht.readTemperature();

 //Read the Humidity value from the sensor
 Humidity = dht.readHumidity();

 //print "The Temperature = " to the serial monitor
 Serial.print("The Temperature = ");

 //print temperature value at the same line
 Serial.print(Temperature);

 //print " Celsius" to the serial monitor at the same line
 Serial.print(" Celsius");

 //print "   The Humidity = " to the serial monitor at the same line
 Serial.print("   The Humidity = ");

 //print The Humidity value to the serial monitor at the same line
 Serial.print(Humidity);

 //print "%" sign to the serial monitor then add new line
 Serial.println("%");

}

Testing it Out

You should also make sure you have chosen the right baud rate (9600) as specified in the code.
know when your plant needs watering

Now access the serial monitor on your Arduino IDE by clicking on the magnifying glass icon at the top right corner.

know when your plant needs watering

As we can see in the following image, the serial monitor displays the relay state. You can also hear the sound of the relay switching on and off every three seconds.

know when your plant needs watering

Resources

No items found.